16. Creating a New Post
Learn how to create a new post in WordPress. You will add a post title and content, then set categories for organization.
Add a New Post
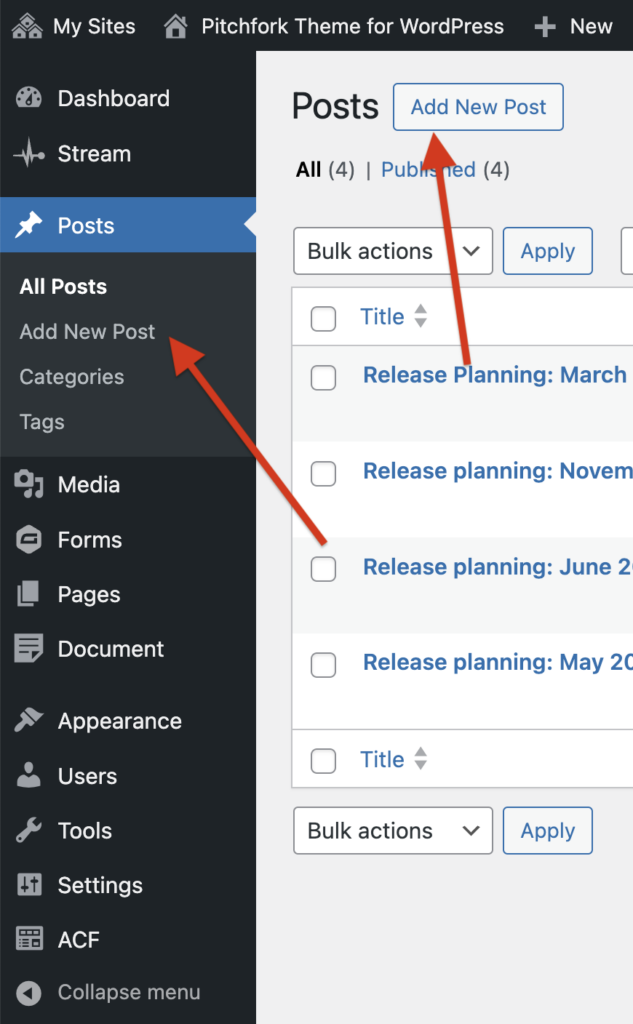
In the left-hand menu of the Dashboard, click on Posts > Add New Post to start a new blog post.

Or, click on Posts and then on the next screen click Add New Post. You will be taken to the page editor screen.
Add post title
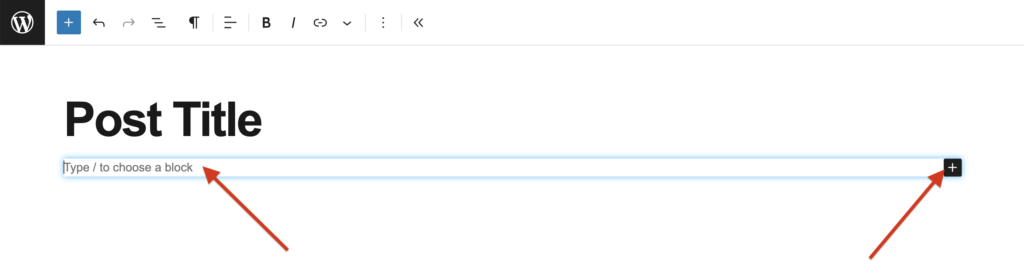
At the top of the post editor screen, enter your post title in the “Add title” field. Use sentence case.

Add content
Below the title field is the content editor. You can start adding content a few ways:
- Type your text content. The default block is a paragraph.
- Type “/” to see a menu of common blocks, or “/ima” for example, to get an “image” block or “/head” to get a “heading” block.
- Click the + button to insert blocks.
Certain blocks are useful for structuring the layout of your content, like columns, headings, and lists.
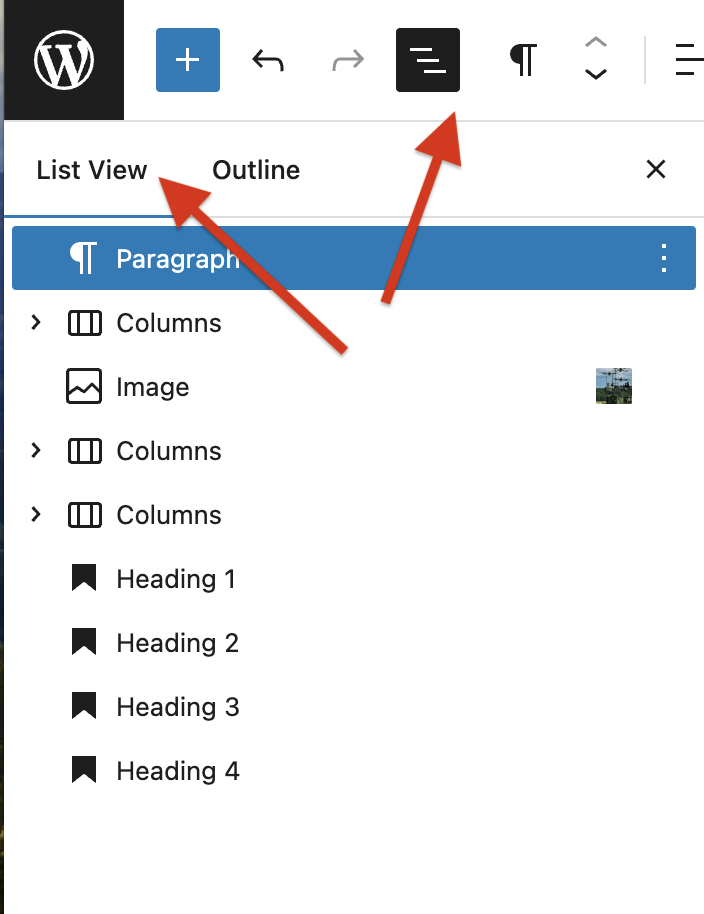
Open the Document Overview (also known as List View) in the left editor panel to keep track of your content as you create your post. This tool provides a clear outline of all headings and blocks, helping you maintain a well-structured and easily navigable layout.
Adjust post settings
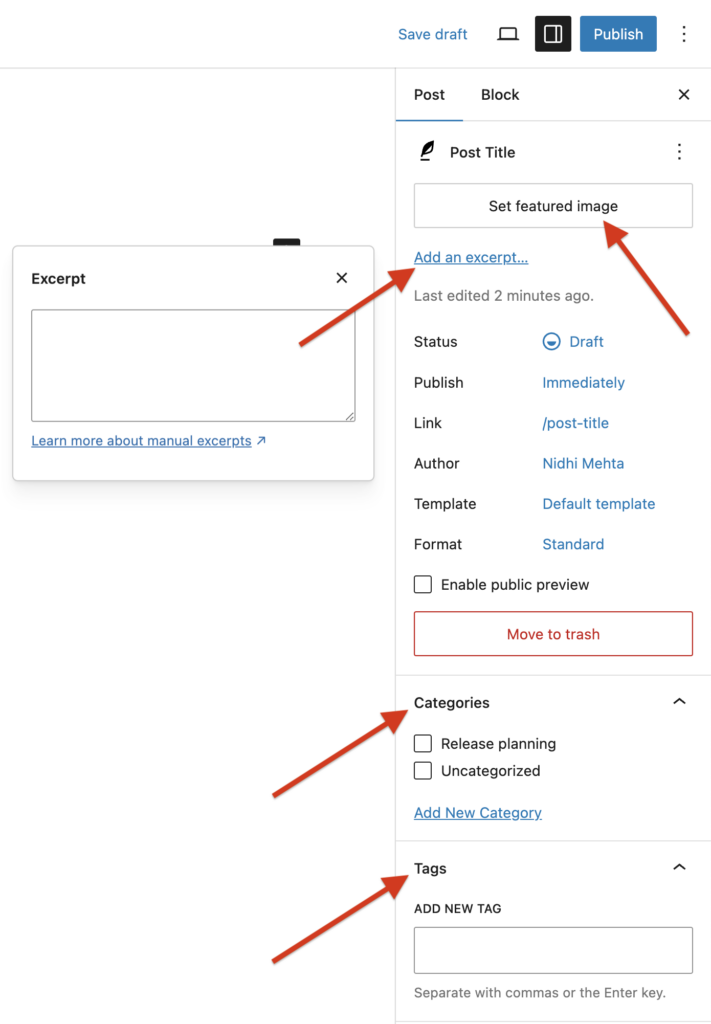
In the Settings panel on the right side of the editing area, click on the Post tab to adjust post settings such as:
- Categories and Tags: Assigning categories or tags to a post will group posts by those themes in an archive page automatically, allowing users to see all the content from a theme in one place.
- Featured Image: Upload a featured image to represent your post. This image will “travel” with your post when you share the link.
- Excerpt: Add a short summary of your post. This, too, will travel with your post when the link is shared.
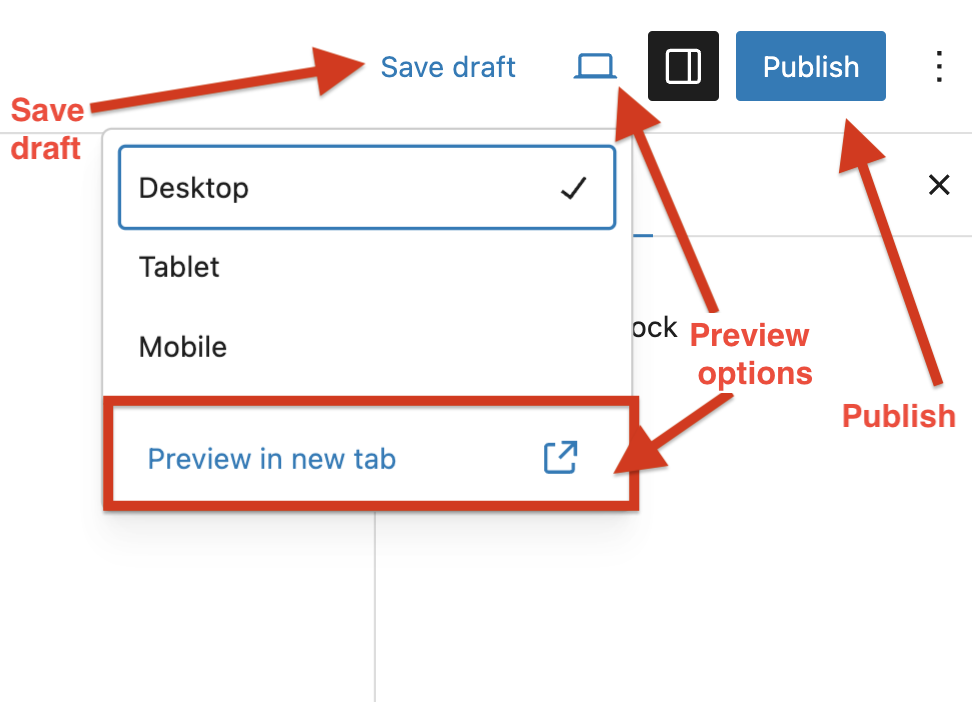
How to save a draft, preview and publish a post
Click Save draft if your post is incomplete. Click Preview to see how your post will look when published (opens in a new tab). When ready, click Publish and Confirm to make your post live.