17. Menu basics

Easily create and edit menus in WordPress by adding and arranging pages, creating sub-menus and using custom links.
Menu options may not be visible to users at the Editor level. If Menu options are not seen, contact your site administrator to adjust menus.
Locating menus
In the dashboard, go to Appearance > Menus to see all existing menus.

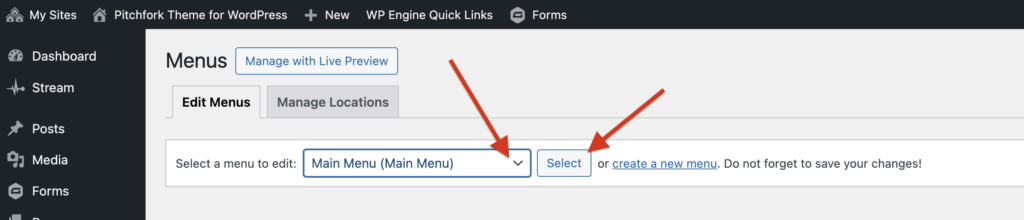
Selecting an existing menu
Select the menu you want to edit from the dropdown menu and click Select.
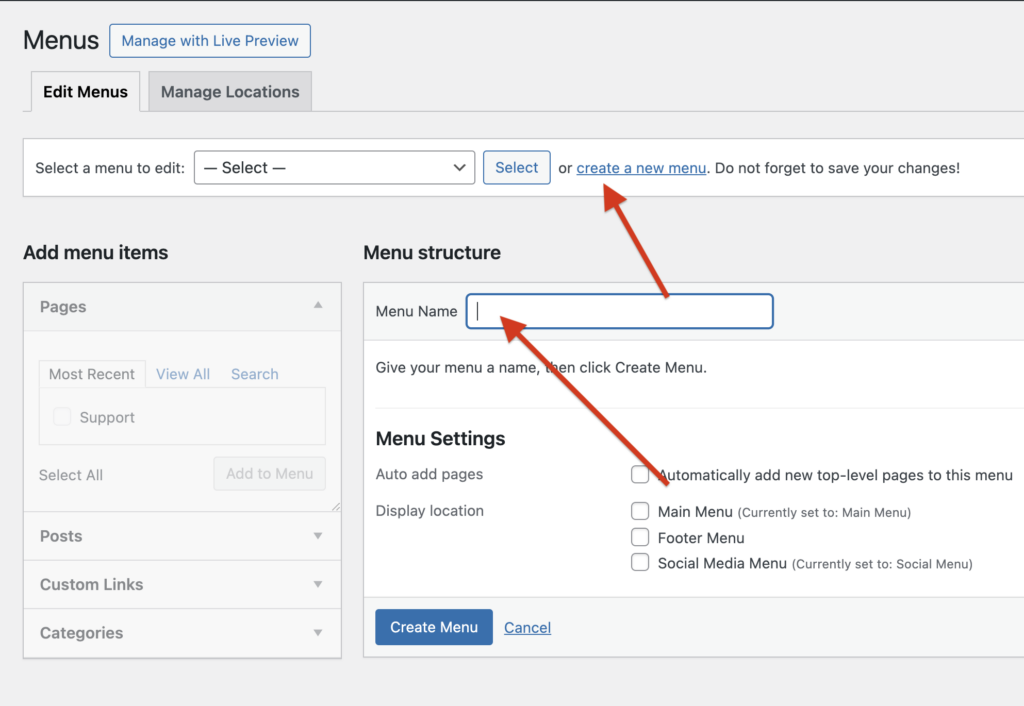
Creating a new menu
Create a menu by clicking on the Create a new menu link. Then name your menu in the Menu Name field.
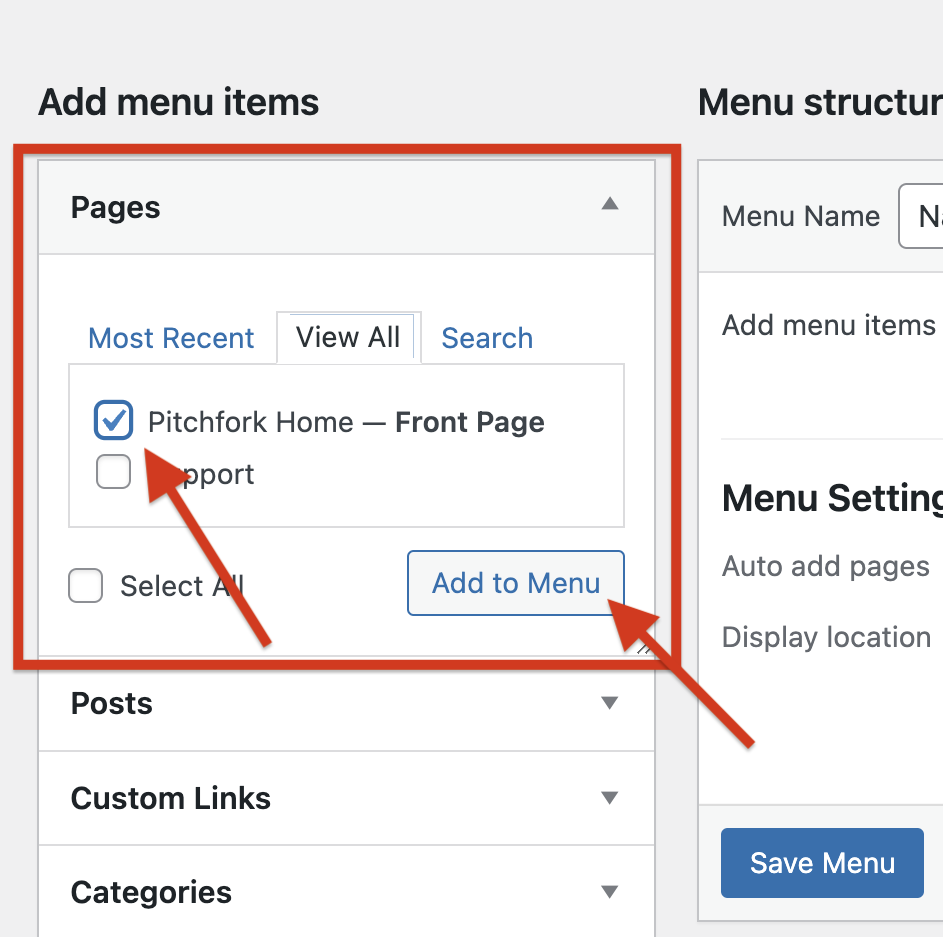
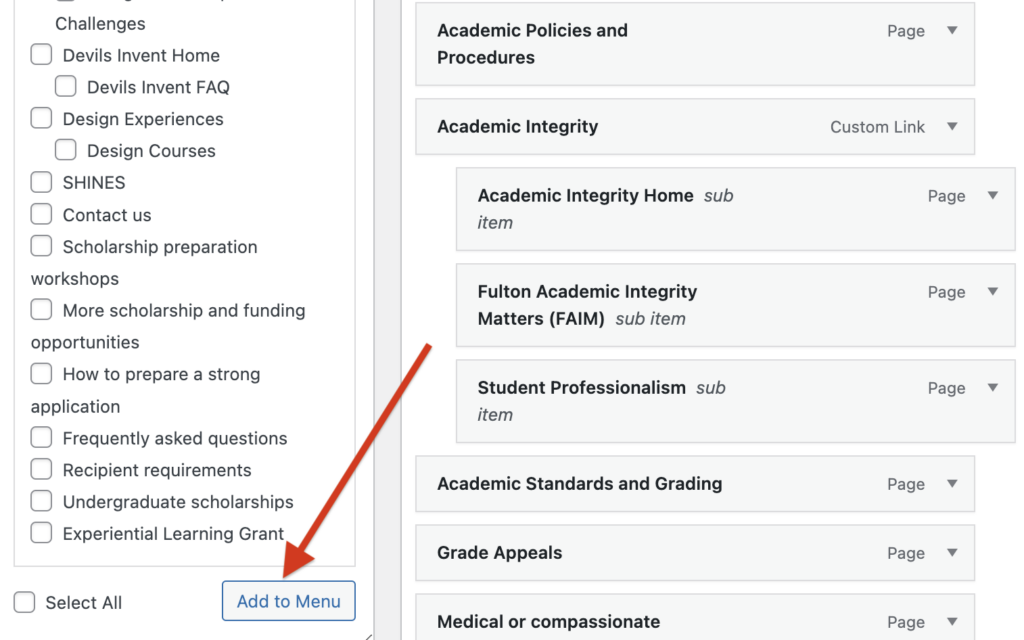
Adding pages to a menu
On the left side of the menu editor, you’ll see a panel labeled Pages. Here, you can view a list of all the pages on your website. Check the box next to the page/s you want to add to your menu, then click the Add to Menu button.
You may also choose Posts, or add Custom Links to pages not in your website.
Once added, your link will have the option to open in a new window. Do not choose this option.
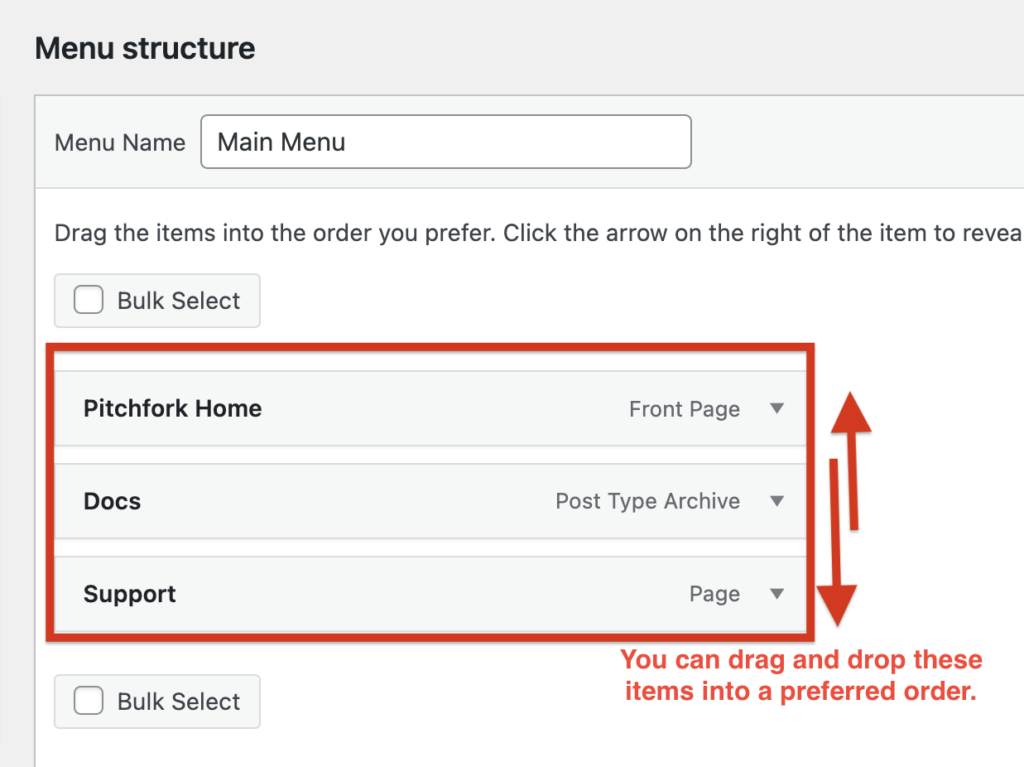
After adding pages to your menu, you can arrange their order by dragging and dropping them into the desired position.
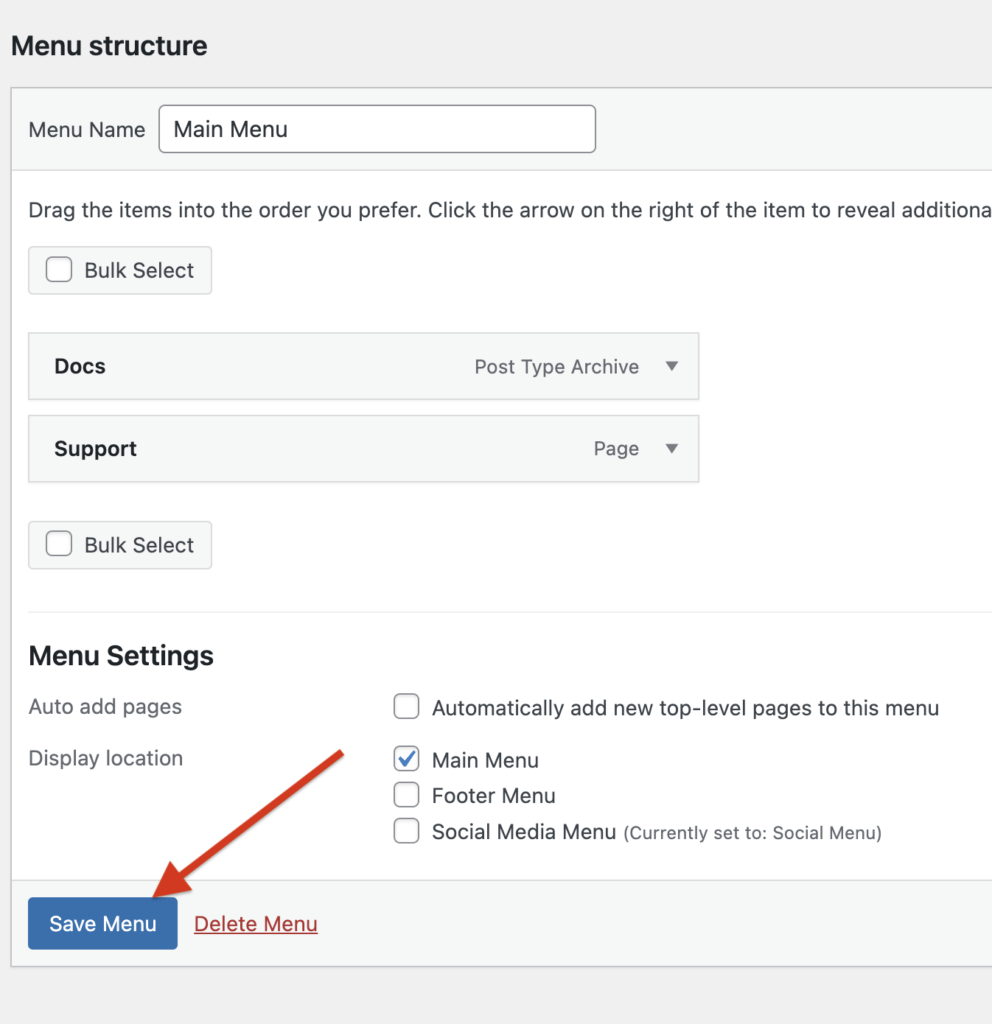
Saving menu
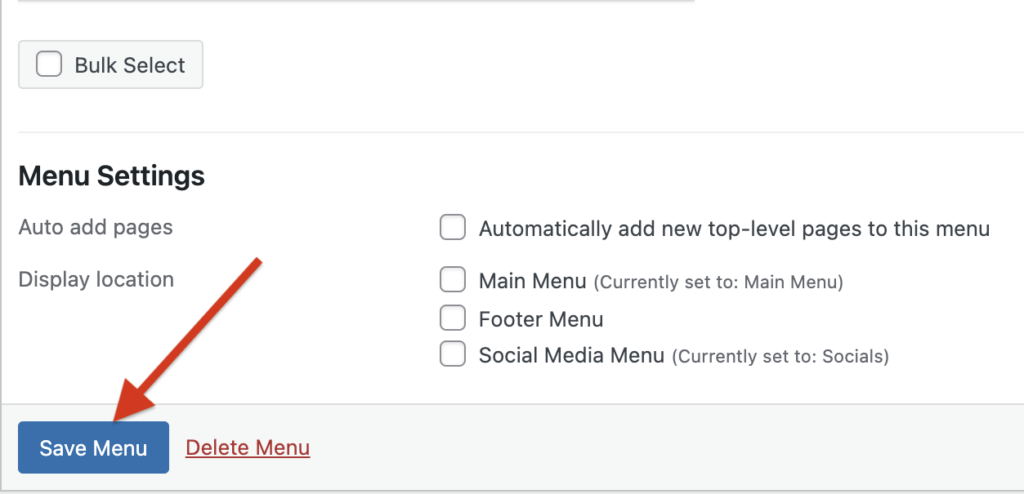
Once you’ve arranged and customized your menu items to your liking, click the Save Menu button to save your changes.
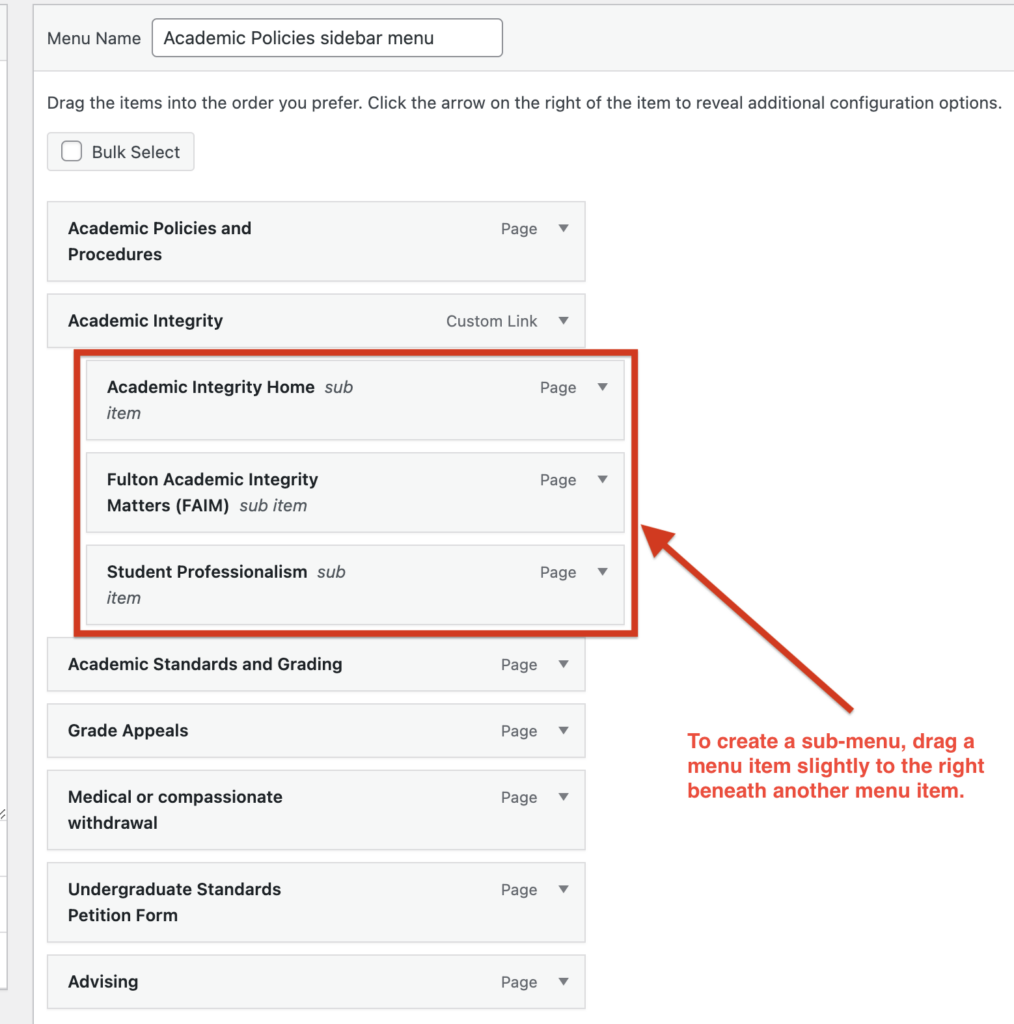
Creating sub-menu items
A submenu is a secondary menu that appears under a main menu item. It helps organize related pages or categories, improving navigation without cluttering the main menu. Users can access it by clicking the main menu item. A good example of submenu can be seen here: https://students.engineering.asu.edu/policies/

- To create a sub-menu (a dropdown menu), drag a menu item slightly to the right beneath another menu item. This action will make the dragged item a sub-item of the item above it.
2. When you add sub-items, the main menu item above the sub-items will no longer link to a page. For accessibility, one click can only have one action. When a submenu is added, the top link now has a new action: opening the sub menu. For this reason, you may need to add the page to the submenu. Often, as in the example above, the topic page is added as the top link and renamed “Page Name Home” or “Page Name Overview.”
Another way to achieve this is to use a custom link as the top item. To do this, look at the left side of the menu editor and you’ll see a panel labeled Custom Links. Click on it to expand the section.
No matter how you achieve a submenu category (by leaving the page at the top level or adding a custom link) Two things are true:
- The top item will never be a link. It will be disabled as a link by the theme as soon as sub-items are added.
- Both methods look and function exactly the same on the live site.
- The top category page will always have to be added to the top of the submenu if you still want people to get to the page.
Adding a custom link
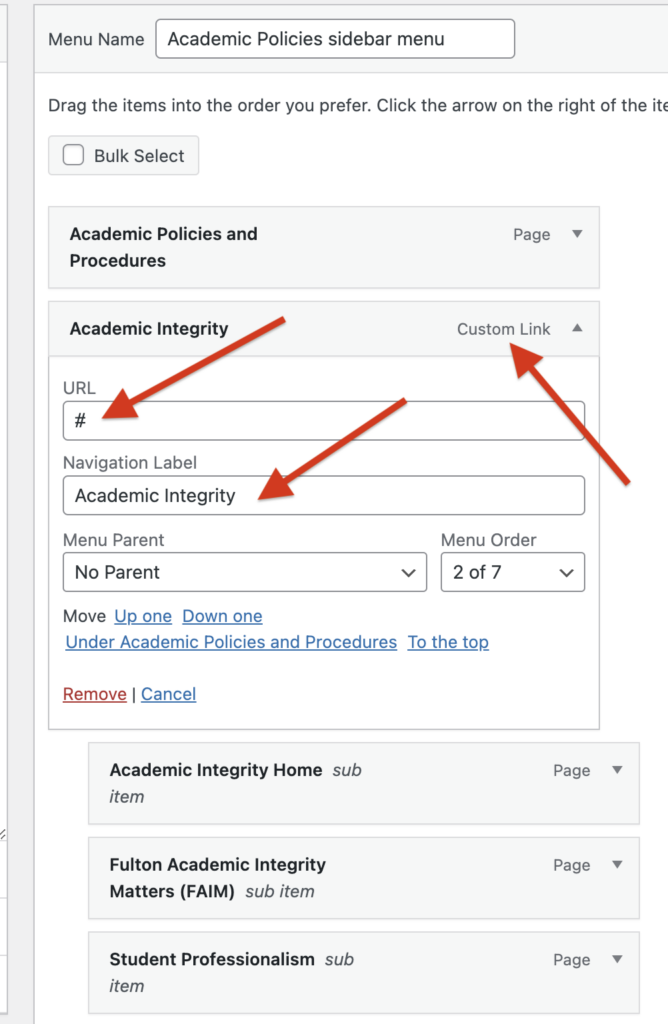
3. In the “URL” field, add a hash mark “#”. In the Link Text field, enter the text that you want to display for the link in the menu.
4. After entering the URL and link text, click the Add to Menu button and move it to where you need it.
5. You can customize menu items by clicking on the down arrow next to a menu.
6. This action will reveal additional settings. Here, you can edit the navigation label (the text displayed in the menu), or turn on a call to action button. Note that button menu items will appear in the farthest right corner of the menu per ASU Web Standards.
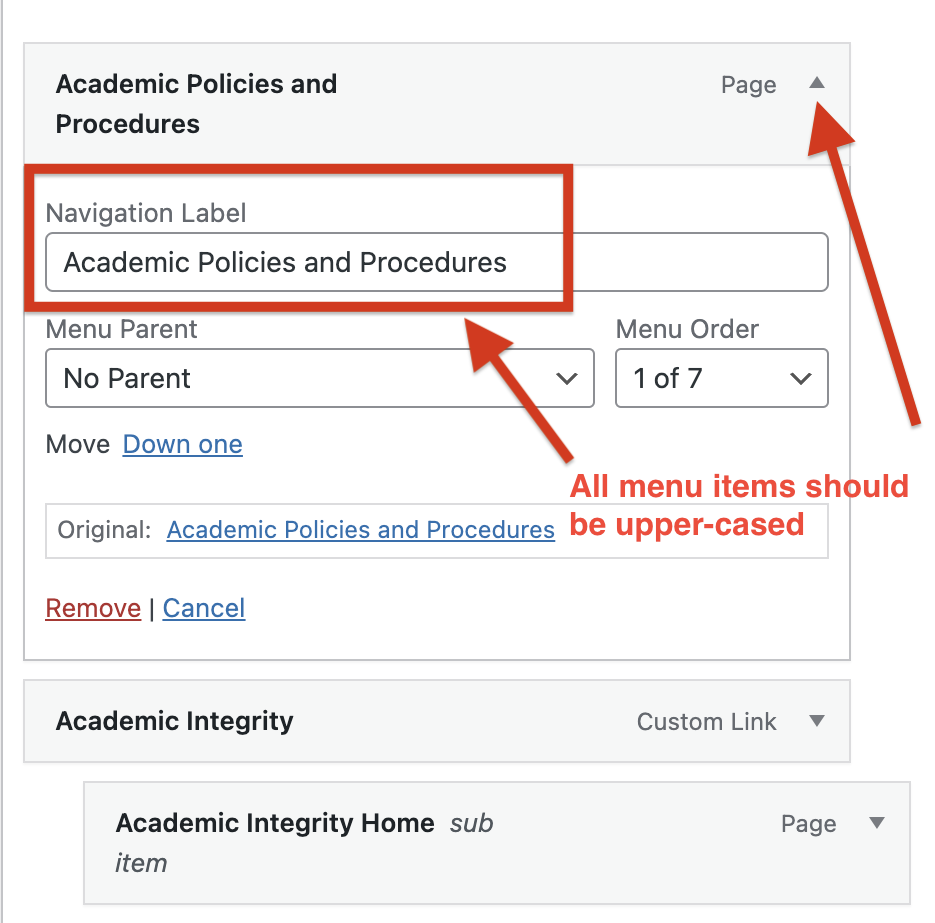
7. All menu items should be upper-cased, e.g. “Degree Programs” per ASU Web Standards.
8. Once you’ve arranged and customized your menu items to your liking, click the Save Menu button to save your changes.
More information
For more information, including how to make a multi-column mega menu, see the Creating a navigation menu documentation.