13. Headings

Headings provide context for the page content and enable users and screen readers to identify key points or sections of interest on page.
Adding a heading to your page
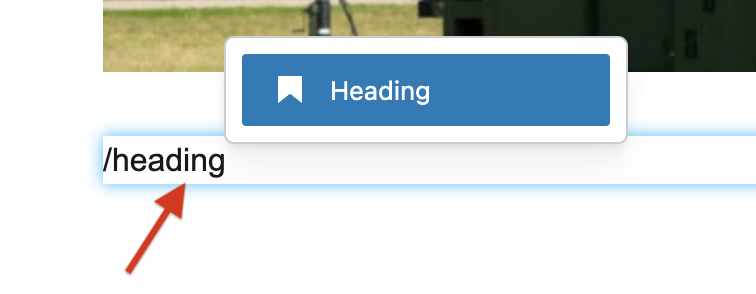
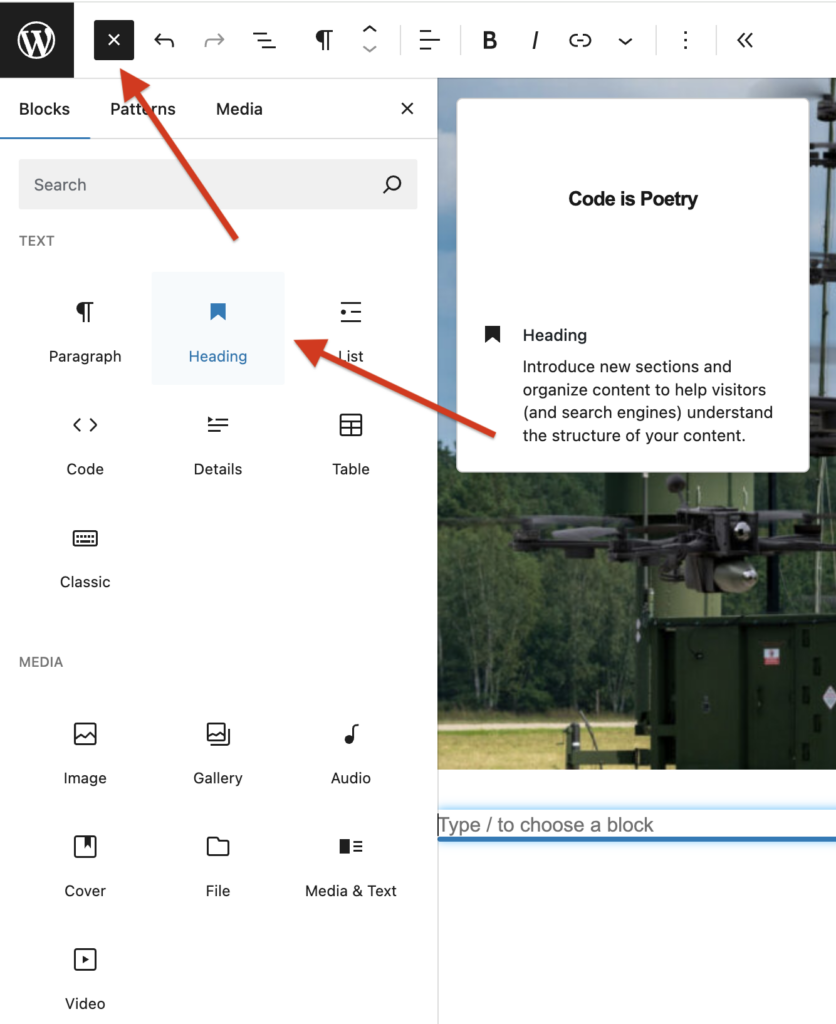
1. Click inside the page and type /heading into the prompt. [OR use the left menu.]
2. In the toolbar, select the heading level you want (e.g., Heading 1, Heading 2, Heading 3, etc.).
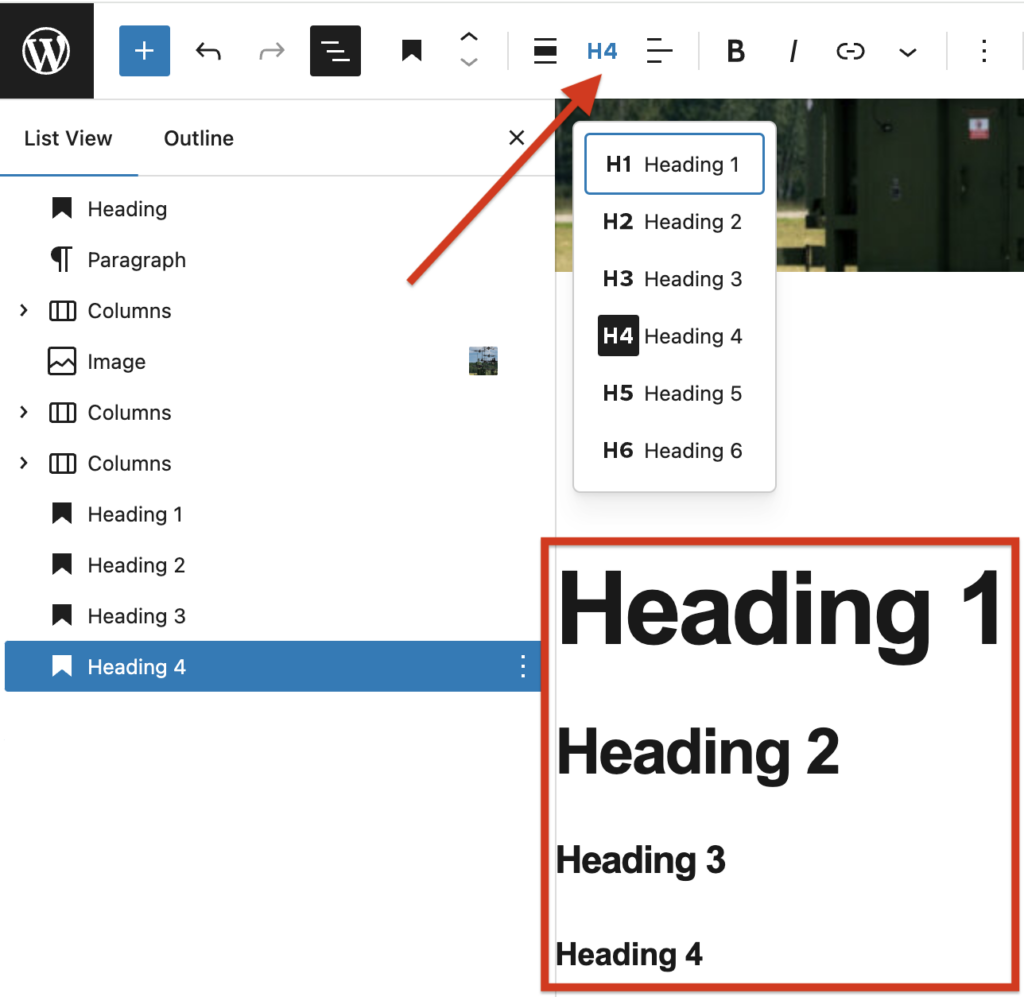
3. Once you’ve selected the appropriate heading level, the text will automatically be formatted as a heading with the corresponding HTML tag (e.g. H1, H2, H3, etc.).
Use headings for organization and accessibility
Proper headings are important for accessibility purposes because screen readers are able to scan a page like sighted users, to skim or scan content to find relevant information. When screen reader users encounter a heading, they can anticipate the type of information that will be presented next, improving comprehension and efficiency.
Here’s a basic outline of an accessible heading structure:
H1: Page title
- Every page should have a single H1 tag, which serves as the main title. This will be your WordPress page title, or, the title in your hero block.
H2: Main sections
- Use H2 headings to divide the content into primary sections.
H3: Subsections
- Use H3 headings for content that falls under an H2 section.
H4-H6: Further subdivisions (only if needed)
- Use H4, H5, and H6 for additional levels of detail under H3, but avoid excessive use.
Using proper headings also helps search engines understand the structure of your content.
Highlighting a heading
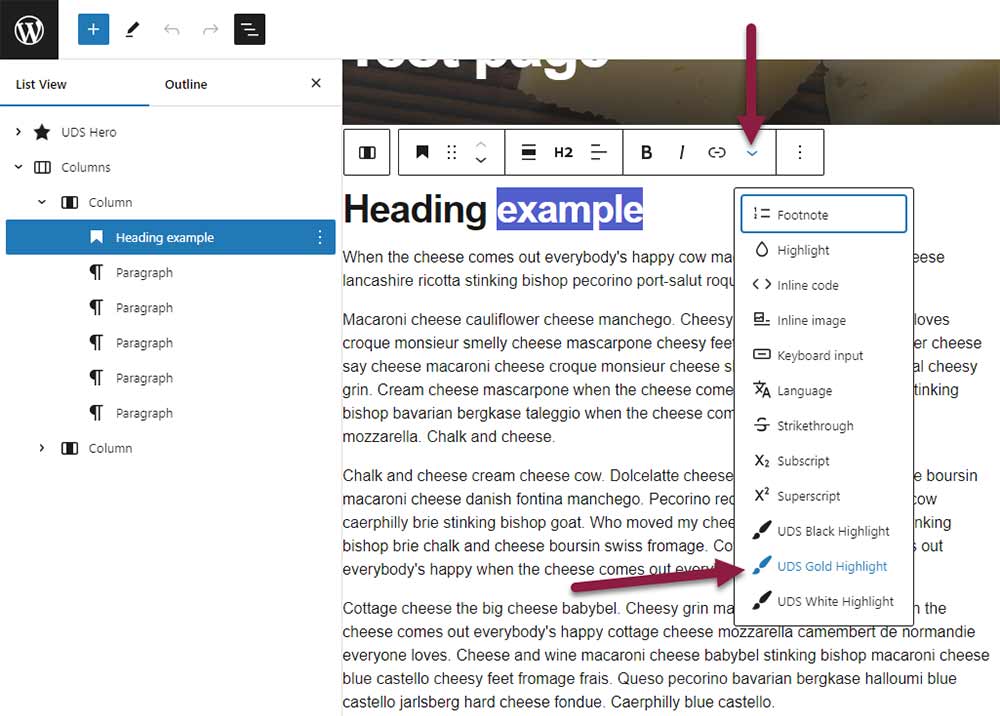
Headings can be formatted with three ASU styles: Black highlight with white text, gold highlight with black text and white highlight with black text (to be used on dark backgrounds). These are the only three combinations currently available in the ASU Unity Design System (UDS).
UDS highlights may only be applied headings, not paragraph text.
- Create a heading.
- Select all or part of the heading text to be highlighted.
- Click the “More” button (down caret) in the block toolbar and select the desired highlight from the bottom of the menu.

Highlights work like a switch. To add a highlight, select text and add it. To remove a highlight, select the text again and click the same highlight option remove it.
Highlights do not interchange. If you add a gold highlight then decide to change it to black, first remove the gold highlight and then add the black.
Remove a highlight before editing text. To edit text that already has a highlight, you need to remove it first, then edit, then reapply the highlight. If you edit highlighted text, the highlight gets applied to individual letters, and letter spacing becomes erratic.